Application Setup
This covers everything you should need to join a CollabXR room or create your own. If you are trying to playtest a developer build, see Playtesting.
Connecting to the Internet
CollabXR requires an internet connection to function. Before starting CollabXR, ensure your device has a working Wi-Fi connection.
Using a Custom App ID
By default, CollabXR includes an App ID (API token) for Photon Fusion and Photon Voice, the networking backend that makes CollabXR possible. This is intended to allow for easier testing and evaluation of CollabXR. This is a development license with a maximum of 20 concurrent users, and is shared by all users testing the application.
For this reason, we ask that you use your own App IDs as soon as you are done evaluating CollabXR. If you just want to join a classroom to test the application, skip to the next section.
To do this, follow the below instructions:
Create both a Photon Fusion and a Photon Voice app. Apps in the development cloud are free for development and testing and work with up to 20 concurrent users.
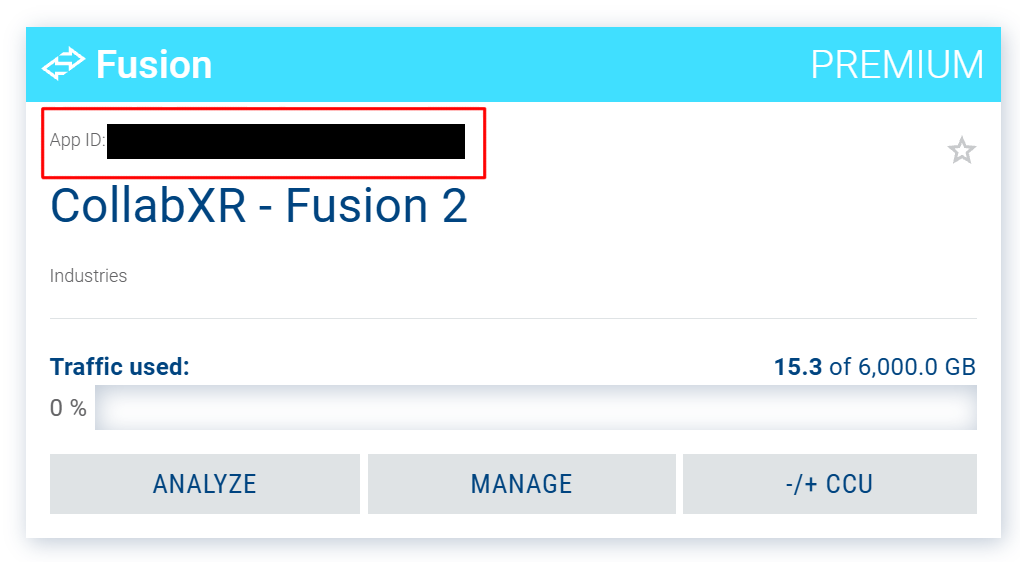
Obtain the App ID for each as shown in the image below.
If you plan to use CollabXR on a Meta Quest, create a separate QR code for each using any online QR code generator.
Open CollabXR, navigate to the Settings tab on the bottom bar, and then Networking.
Enable the “Use Custom Photon App ID” switch.
Press the QR icon next to each field to scan a QR code, or enter the IDs manually.
Your App IDs will be saved automatically to the headset, and you may continue on to joining a room.
From now on, when you launch CollabXR you will be using these custom App IDs. Any user you intend to connect to will also need to be using these App IDs.
Joining a Room
Once the application is open, you should see a menu that says “Join a Classroom.”
Joining with a QR Code
Note
Joining a room without changing your Photon App IDs will place you in a room using the Envision Center’s development API keys. This is intended only for testing and evaluating CollabXR. If you are using CollabXR for research, education, or any other production environment we ask that you use a custom App ID.
If you have a QR Code for your room, ensure the QR Code is on a flat surface and in bright lighting so it is easily visible in the headset.
Press “Scan room code” to enter scanning mode, stand next to the QR Code, and look directly at it. Once scanned, axis arrows should show up on top of the QR Code–this means you are connected!
If the QR Code does not scan initially, try getting closer to it and looking at the code from different angles.
If the UI abruptly disappears, before showing “Join a Classroom” again, check your internet connection.
Connecting Directly
You can optionally enter the room name into the text box “Enter room name…” and press connect to directly join a room. You will not be colocated upon joining when using this method, but you can still co-locate while in the room if you have a QR Code available.
Colocation
“Colocation” is a state where multiple devices are tied to the same shared, collaborative space. This is key to the instructional aspect of CollabXR, where interactions in both a physical space and digital space can work together.
Colocation and QR Codes
QR Codes are useful for colocating, as they define a position and orientation in 3D space in a way that most devices can understand. For the best experience, it is recommended to follow these practices when using QR Codes.
Always place your QR Code flat on the floor
Do not move the QR Code after connecting to a room
With the above two in mind, place your QR Code in a spot where it is unlikely to be stepped on
Ensure your QR Code is large enough to be clearly visible on camera
Ensure your QR Code is in bright lighting
Colocating while in a Room
Devices can sometimes “drift” and lose their colocation due to poor tracking, latency, or the device falling asleep. You can tell if a user is not co-located because the “User” tag above their head will be offset or not be visible, and they will not see objects in the same position as you do. This can be fixed by re-scanning the QR Code while inside the room.
Open the menu using the bottom button on your Quest controller
On the bottom bar, select the “Colocate” tab with the QR Code icon
Stand next to your QR Code and look directly at it
If the colocation was successful, you should see the axis arrows re-appear on top of the QR Code.
Creating Your Own Room
To create your own room, use a QR Code generator from online. Room codes just need to be raw text, they do not need to be a web URL or anything. Enter in the desired name of your room, and print out the QR Code on a sheet of paper–make sure it’s large enough to be read by the headset, about 6 inches across minimum.
Place the QR Code on the ground, and you should be ready!